
Code sạch hơn với việc dùng Extension trong Swift


Nếu 
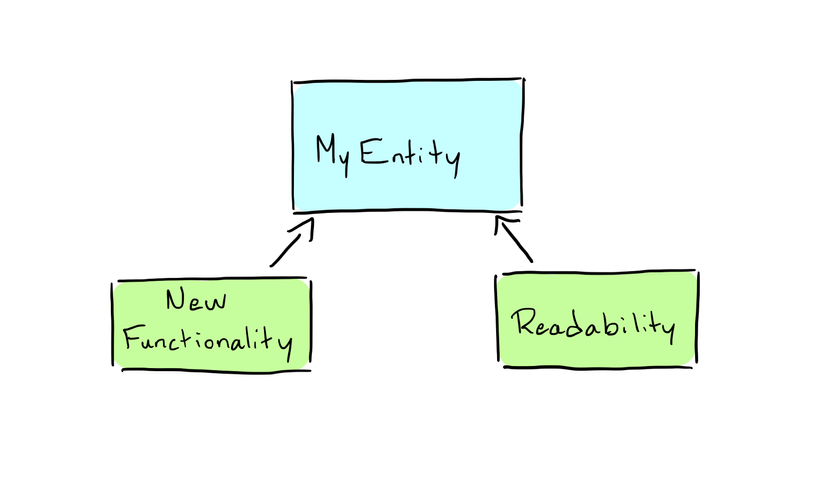
như với ARC sẽ giúp tăng hiệu năng ứng dụng của bạn hơn thì Extension sẽ giúp code của bản trở nên dễ dàng đọc hơn (clean code)

1. Extension là gì?

Trong swift Extension thường được sử dụng những nơi mà bạn muốn thêm các hàm mà không có quyền truy cập vào source code. Ví dụ như bạn muốn mở rộng Int có sẵn của Swift bạn có thể làm như sau :
extension Int {
  func multiply(by multiplier: Int) -> Int {
    return self * multiplier
  }
}
10.multiply(by: 2)
// Returns 20
Việc sử dụng extension không chỉ áp dụng với source không có quyền truy cập mà nó được dùng cho cả source bạn có thể truy cập để code của bạn trở nên dễ đọc, dễ hiểu hơn.

2. Ví dụ tiện lợi của việc dùng Extension

Ở đây chúng ta sẽ tiền hành xây dựng một class Binary Search Tree.

Bước 1: Xây dựng Protocol

Binary Search Tree là một cấu trúc dữ liệu dừng để lưu trữ và tìm kiếm dữ liệu. Nó dựa vào hoạt động của các Node, là nơi lưu trữ giá trị và tham chiếu tới các node khác của tree. Ngoài ra tree cũng có một số phương thức như add, remove, find dữ liệu trong cấu trúc. Giờ chúng ta bắt đầu với việc tạo ra 2 protocol
protocol SearchTree {
  associatedtype DataType: Comparable
  
  func add(_ data: DataType) -> Bool
  func contains(_ data: DataType) -> Bool
  func find(_ data: DataType) -> DataType?
  func delete(_ data: DataType) -> DataType?
  func remove(_ data:DataType) -> Bool
}

protocol BinaryNode {
  associatedtype DataType: Comparable

  var value: DataType { get set }
  var parent: Self? { get set }
  var left: Self? { get set }
  var right: Self? { get set }
  var isLeaf: Bool { get }
}

extension BinaryNode {
  var isLeaf: Bool {
    return self.left == nil && self.right == nil
  }
}
Trong đoạn code trên, protocol SearchTree chỉ định ra những hàm mà Search Tree sẽ triển khai, và cũng chỉ định ra kiểu của dữ liệu chúng ta chọn để lữu trữ trong tree phải implement Comparable protocol. BinaryNode protocol chỉ định các thuộc tính cần để biểu diễn node của tree mà chúng ta có thể xử lý và tính toán.

Bước 2: Implement các protocol

Tạo ra class implement các phương thức trong protocol ở trên :
class BST<DataType: Comparable>: SearchTree {
  private typealias NodeType = BSN<DataType>
  private var root: NodeType?

  init(rootValue: DataType) {
    self.root = NodeType(value: rootValue)
  }

  init(rootValue: DataType, leftTree: BST, rightTree: BST) {
    self.root = NodeType(value: rootValue, left: leftTree.root, right: rightTree.root)
  }

  private init(rootNode: NodeType) {
    self.root = rootNode
  }

  func add(_ data: DataType) -> Bool {
    return false
  }

  func contains(_ data: DataType) -> Bool {
    return false
  }

  func find(_ data: DataType) -> DataType? {
    return nil
  }

  func delete(_ data: DataType) -> DataType? {
    return nil
  }

  func remove(_ data:DataType) -> Bool {
    return false
  }

  private final class BSN<DataType: Comparable>: BinaryNode {
    var value: DataType
    var parent: BSN<DataType>?
    var left: BSN<DataType>?
    var right: BSN<DataType>?

    init(value: DataType) {
      self.value = value
    }

    init(value: DataType, left: BSN?, right: BSN?) {
      self.value = value
      self.left = left
      self.right = right
    }
  }
}
Nếu như triển khai code như thế này sẽ khiến cho chúng ta khó có một cái nhìn tổng quan. Sẽ khó để tìm kiếm khi cần sửa đổi một trong các phương thức của SearchTree protocol. Bạn sẽ tự đặt ra câu hỏi rằng: " Chúng ta sẽ thêm các phương thức mới ở đâu nếu chúng ta muốn có thể tìm kiếm chúng nhanh chóng sau này? "

Bước 3: Refactor sử dụng Extension

Thực chất Extension không được sinh ra để giải quyết vấn đề code dễ đọc hơn nhưng chúng ta có thể sử dụng theo cách này như một hiệu ứng phụ của nó.
class BinarySearchTree<DataType: Comparable> {
  fileprivate typealias NodeType = BinarySearchNode<DataType>
  private var root: NodeType?

  init(rootValue: DataType) {
    self.root = NodeType(value: rootValue)
  }

  init(rootValue: DataType, leftTree: BinarySearchTree, rightTree: BinarySearchTree) {
    self.root = NodeType(value: rootValue, left: leftTree.root, right: rightTree.root)
}

  private init(rootNode: NodeType) {
    self.root = rootNode
  }
}

extension BinarySearchTree: SearchTree {
  func add(_ data: DataType) -> Bool {
    return false
  }

  func contains(_ data: DataType) -> Bool {
    return false
  }

  func find(_ data: DataType) -> DataType? {
    return nil
  }

  func delete(_ data: DataType) -> DataType? {
    return nil
  }

  func remove(_ data:DataType) -> Bool {
    return false
  }
}

private extension BinarySearchTree {
  final class BinarySearchNode<DataType: Comparable>: BinaryNode {
    var value: DataType
    var parent: BinarySearchNode<DataType>?
    var left: BinarySearchNode<DataType>?
    var right: BinarySearchNode<DataType>?

    init(value: DataType) {
      self.value = value
    }

    init(value: DataType, left: BinarySearchNode?, right: BinarySearchNode?) {
      self.value = value
      self.left = left
      self.right = right
    }
  }
}
Có thể thấy code trở lên clean hơn việc không sử dụng extension. Bât cứ những thứ gì chỉ thuộc về class này sẽ được nằm trong scope của nó, bao gồm khởi tạo, thuộc tính và phương thức không thực hiện các protocol tại đây. Chúng ta sử dụng extension class để triển khai các phương thức trong protocol giúp cho việc quản lý code trở lên dễ dàng hơn.

Nguồn tham khảo :

https://medium.com/@JimmyMAndersson/using-swift-extensions-to-clean-up-our-code-1aed32da24bc?fbclid=IwAR24d0rdINQYHc8R3lqF5Fd8p2V-iEueSVZwoAmEvlstboPRS-v0_nKeeK8

Comments

Popular posts from this blog

Alamofire vs URLSession

Alamofire vs URLSession: a comparison for networking in Swift Alamofire and URLSession both help you to make network requests in Swift. The URLSession API is part of the foundation framework, whereas Alamofire needs to be added as an external dependency. Many  developers  doubt  whether it’s needed to include an extra dependency on something basic like networking in Swift. In the end, it’s perfectly doable to implement a networking layer with the great URLSession API’s which are available nowadays. This blog post is here to compare both frameworks and to find out when to add Alamofire as an external dependency. Build better iOS apps faster Looking for a great mobile CI/CD solution that has tons of iOS-specific tools, smooth code signing, and even real device testing? Learn more about Bitrise’s iOS specific solutions! This shows the real power of Alamofire as the framework makes a lot of things easier. What is Alamofire? Where URLSession...

Swift Tool Belt, Part 1: Adding a Border, Corner Radius, and Shadow to a UIView with Interface Builder

During my iOS work, I’ve assembled a set of code that I bring with me on every iOS project. I’m not talking about large frameworks or CocoaPods here. These are smaller Swift extensions or control overrides that are applicable to many projects. I think of them as my tool belt. In this post, I’ll show you an extension that will add a border, a corner radius, and a shadow to any UIView, UIButton, or UILabel and allow you to preview what it will look like in Interface Builder. Back in 2014, I wrote a blog post on Expanding User-Defined Runtime Attributes in Xcode where I added a border, corner radius, and shadow to a UIView using Interface Builder’s user-defined runtime attributes. This solution had no type checking—you had to type the property you wanted to modify by hand and often had to look up what it was called. You also had to run your project in order to see the effect of the runtime attribute. Starting with Xcode 6 , there is a new mech...

Frame vs Bounds in iOS

This article is a repost of an answer I wrote on Stack Overflow . Short description frame = a view’s location and size using the parent view’s coordinate system ( important for placing the view in the parent) bounds = a view’s location and size using its own coordinate system (important for placing the view’s content or subviews within itself) Details To help me remember frame , I think of a picture frame on a wall . The picture frame is like the border of a view. I can hang the picture anywhere I want on the wall. In the same way, I can put a view anywhere I want inside a parent view (also called a superview). The parent view is like the wall. The origin of the coordinate system in iOS is the top left. We can put our view at the origin of the superview by setting the view frame’s x-y coordinates to (0, 0), which is like hanging our picture in the very top left corner of the wall. To move it right, increase x, to move it down increase y. To help me remember bound...