
Dark and Light Mode with RxTheme

1. Giới thiệu

Tại sự kiện WWDC 2019 vừa qua của Apple, họ đã giới thiệu với chúng ta hệ điều hành iOS 13 với chế độ DarkMode toàn hệ thống, với việc các điện thoại cao cấp của Apple hiện nay đều sử dụng màn hình OLED, việc hệ điều hành iOS có chế độ DarkMode sẽ giúp giảm đáng kể lượng tiêu thụ pin của thiết bị và việc sử dụng chế độ DarkMode sẽ giúp cho đỡ hại mắt của chúng ta hơn, đặc biệt khi sử dụng điện thoại vào ban đêm. Vậy còn các ứng dụng bên thứ 3, chúng ta có cần phải có DarkMode cho đồng bộ với hệ điều hành hay không? Theo tôi nghĩ điều này là cần thiết, và trong bài viết này tôi sẽ giới thiệu đến các bạn cách thức để xây dựng một ứng dụng có thể switch giữa Dark và Light Mode sử dụng thư viện RxTheme.

2. Xây dựng ứng dụng demo

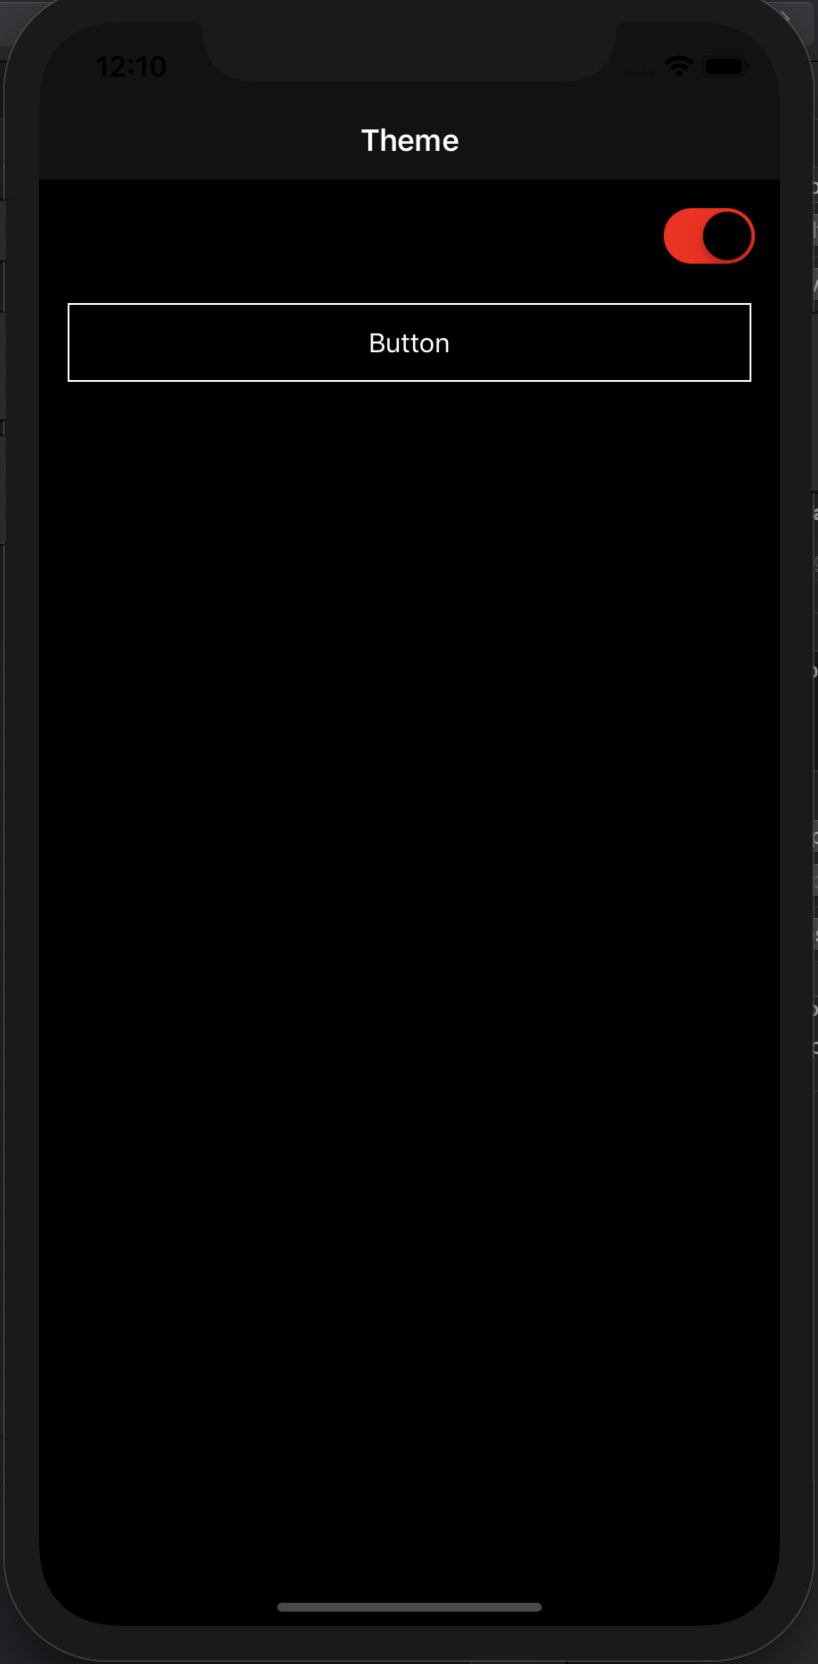
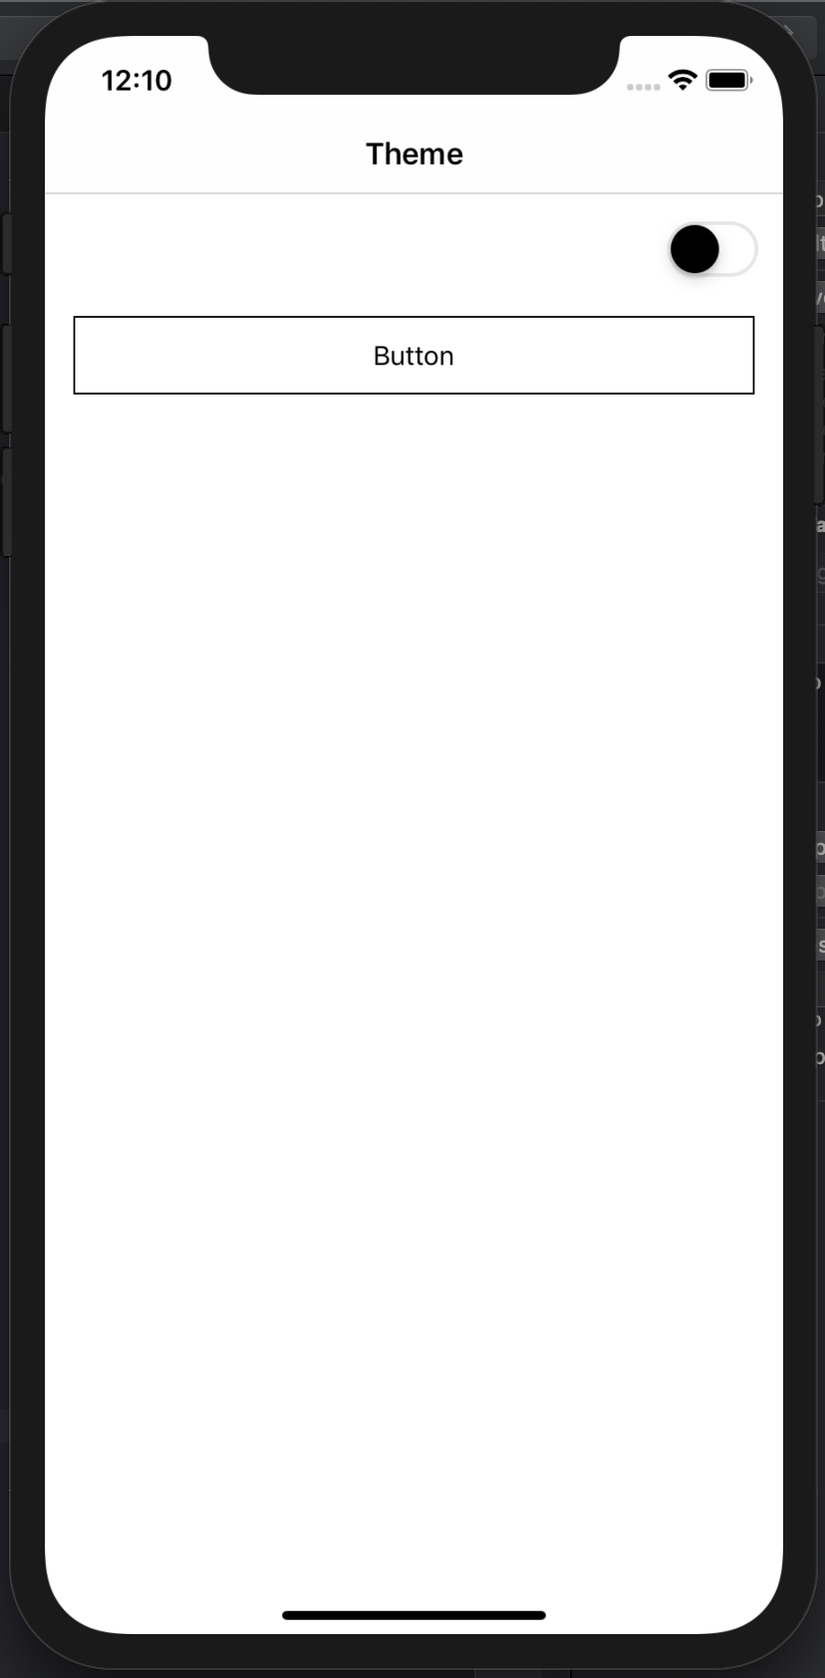
Trong bài viết này tôi sẽ cùng các bạn thực hiện một ứng dụng demo:
1. Ứng dụng có 2 theme là Dark và Light

2. Khi bấm vào Switch thì sẽ thực hiện việc thay đổi theme

3. Thay đổi các thành phần trong theme như: Navigationbar, background, Button, Switch

Việc đầu tiên là chúng ta sẽ khởi tạo project, ở đây tôi gọi tên project là DarkModeDemo, tiếp theo ta add pod 'RxTheme' vào trong Podfile của chúng ta và install nó.

Config Theme Manager

Chúng ta tạo ra một file đặt tên là ThemeManager:
protocol Theme {
    var backgroundColor: UIColor { get }
    var textColor: UIColor { get }
    var onTintColor: UIColor { get }
}

struct LightTheme: Theme {
    let backgroundColor = UIColor.white
    let textColor = UIColor.black
    let onTintColor = UIColor.white
}

struct DarkTheme: Theme {
    let backgroundColor = UIColor.black
    let textColor = UIColor.white
    let onTintColor = UIColor.red
}

enum ThemeType: ThemeProvider {
    case light, dark
    var associatedObject: Theme {
        switch self {
        case .light: return LightTheme()
        case .dark: return DarkTheme()
        }
    }
}

let themeService = ThemeType.service(initial: .dark)

public extension Reactive where Base: UISwitch { // Binder cho UISwitch
    var onTintColor: Binder<UIColor?> {
        return Binder(self.base) { view, attr in
            view.onTintColor = attr
        }
    }
}
Chúng ta thực hiện config Theme bao gồm Dark và Light, trong ví dụ này ta sẽ có 3 tham số backgroundColor, textColor, onTintColor, còn trong ứng dụng của các bạn, các bạn có thể thêm những tham số cần thiết cho việc config nhé.

Xử lý việc update theme

Trong ViewController, các bạn thực hiện việc setup theme cho các control:
class ViewController: UIViewController {
    let disposeBag = DisposeBag()
    
    @IBOutlet weak var themeSwitch: UISwitch!
    @IBOutlet weak var button: UIButton!
    
    override func viewDidLoad() {
        super.viewDidLoad()
        
        // Update navigationBar Theme
        if let navigationBar = navigationController?.navigationBar {
            themeService.rx
                .bind({ $0.backgroundColor }, to: navigationBar.rx.barTintColor)
                .bind({ $0.backgroundColor }, to: navigationBar.rx.tintColor)
                .bind({ [NSAttributedString.Key.foregroundColor: $0.textColor] }, to: navigationBar.rx.titleTextAttributes)
                .disposed(by: disposeBag)
        }
        
        // Update background Theme
        themeService.rx
            .bind({ $0.backgroundColor }, to: view.rx.backgroundColor)
            .disposed(by: disposeBag)
        
        // Update Switch Theme
        themeService.rx
            .bind({ $0.onTintColor }, to: [themeSwitch.rx.onTintColor])
            .disposed(by: disposeBag)
        
        // Update Button Theme
        button.layer.borderWidth = 1.0
        
        themeService.rx
            .bind({ $0.backgroundColor }, to: button.rx.backgroundColor)
            .bind({ $0.textColor }, to: button.rx.titleColor(for: .normal))
            .bind({ $0.textColor.cgColor }, to: button.layer.rx.borderColor)
            .disposed(by: disposeBag)
        
        // Handle change your theme
        themeSwitch.rx.controlEvent(UIControl.Event.allEvents)
            .withLatestFrom(themeService.typeStream)
            .map { $0 == .dark ? .light : .dark }
            .bind(to: themeService.switcher)
            .disposed(by: disposeBag)
    }
}
Chạy ứng dụng, các bạn sẽ được kết quả như bên trên, khá đơn giản phải không nào.

Kết luận

Trên đây tôi đã giới thiệu đến các bạn cách để thực hiện việc update Theme cho ứng dụng iOS sử dụng RxTheme. Chúng ta không phải là Apple hay Google, chúng ta đang đi cùng họ, vậy nên khi họ thay đổi thì chúng ta ắt hẳn cũng phải thay đổi cùng để tồn tại

Comments

Popular posts from this blog

Swift GCD part 1: Thread safe singletons

Preview Singletons are entities, referenced to the same instance of a class from everywhere in your code. It doesn't matter if you like them or not, you will definitely meet them, so it's better to understand how they work. Constructing and handling a set of data doesn't seem to be a big challenge at first glance. The problems appear when you try to optimise the user experience with background work and your app starts acting weird. ??‍♂️ After decades of watching your display mostly with a blank face, you finally realize that your data isn't handled consistently by the manager because you're accessing it (running tasks on it) from multiple threads at the same time. So you really do have to deal with making your singletons thread safe. This article series is dedicated to thread handling using Swift. In the first part below you will get a comprehensive insight into som...

Thread safe singleton’s in Swift

What are singletons? — Singleton is design patterns which says that there should be only one instance of the class for the lifetime of the application. One the best example of Singleton is AppDelegate . How to write a singleton class ? class DefaultDict{ private var dict:[String:Any] = [:] public static let sharedManager = DefaultDict() private init(){ } public func set(value:Any,key:String){ dict[key] = value } public func object(key:String) -> Any?{ dict[key] } public func reset(){ dict.removeAll() } }   Testing singleton class under concurrent circumstances. We are going to write an example where we will set values in dict from various threads and even try to access some with different threads. When we do this we will encounter a crash. If you look closely it will be because of race condition and the crash will be on line set(value:Any,key:String) . class ViewController: UIViewController { ...

Frame vs Bounds in iOS

This article is a repost of an answer I wrote on Stack Overflow . Short description frame = a view’s location and size using the parent view’s coordinate system ( important for placing the view in the parent) bounds = a view’s location and size using its own coordinate system (important for placing the view’s content or subviews within itself) Details To help me remember frame , I think of a picture frame on a wall . The picture frame is like the border of a view. I can hang the picture anywhere I want on the wall. In the same way, I can put a view anywhere I want inside a parent view (also called a superview). The parent view is like the wall. The origin of the coordinate system in iOS is the top left. We can put our view at the origin of the superview by setting the view frame’s x-y coordinates to (0, 0), which is like hanging our picture in the very top left corner of the wall. To move it right, increase x, to move it down increase y. To help me remember bound...