
iOS Tips: Tạo các đoạn code sẵn để code nhanh hơn trong xCode


Bài viết tuy không dài nhưng có thể nó sẽ rất hữu ích, khi các bạn code phải tái sử dụng nhiều và cần lưu lại các đoạn code đó để không phải viết lại, xcode đã hỗ trợ điều đó, bạn hãy tạo Code Snippet. Code Snippet hiển thị ở góc dưới bên phải của xcode (bên dưới phần tiện ích) Bất cứ khi nào bạn tìm thấy một số mã hữu ích mà bạn có thể sử dụng lại trong xcode, hãy tạo một đoạn mã. Đoạn mã xuất hiện ở góc dưới bên phải của xcode (bên dưới phần tiện ích).
code snippets
Có rất nhiều đoạn code được xác định trước trong xcode. Bạn chỉ cần kéo đoạn mã cần thiết vào khu vực bạn muốn rất đơn giản. Tất nhiên đôi khi bạn phải chỉnh sửa lại một số thứ như tên biến hoặc tất cả theo code của bạn. Nó khá hữu ích trong lập trình.

Làm thế nào để tự tạo một Code Snippet?

Tạo một đoạn Code Snippet rất dễ dàng. Chỉ cần chọn mã mà bạn muốn tạo và kéo nó vào phần Code Snippet ở phía dưới bên phải của xcode. Một cửa sổ sẽ xuất hiện và ở đó bạn có thể đổi tên nó và thêm một số mô tả. Xem ảnh bên dưới.

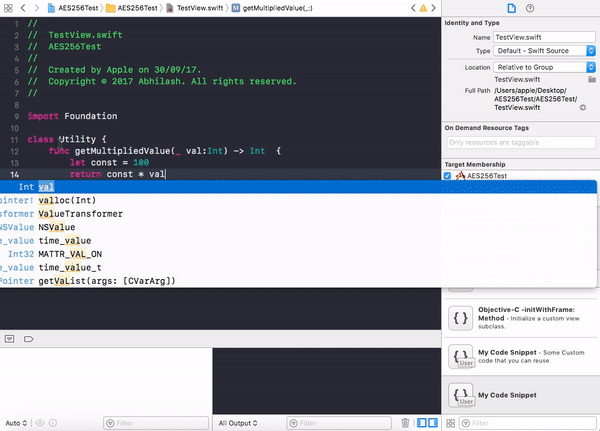
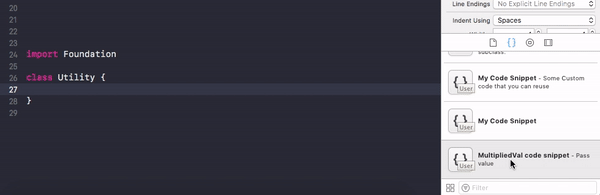
Tạo một Code Snippet
Bây giờ đoạn code được tạo. Chỉ cần kéo đoạn mã từ phần code snippet vào khu vực bạn cần.

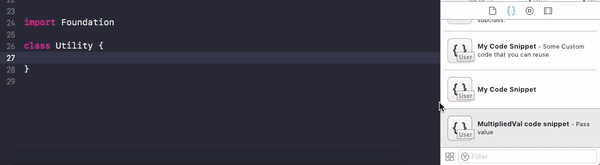
Sử dụng Code Snippet
Nhưng nếu bạn cần tạo placeholder trong đoạn code, bạn có thể chỉnh sửa đoạn mã bạn vừa lưu và thêm placeholder cho nó. Placeholder được viết như sau:
let const = <# placeholder_text/code #>
Nhìn vào ảnh bên dưới:

Tạo phím tắt

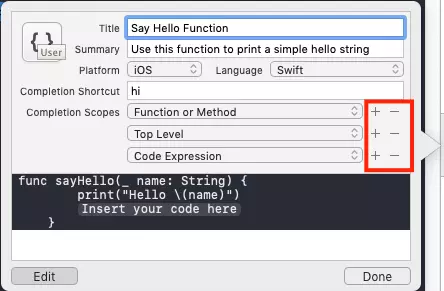
Ngoài việc kéo thả code snippet vào chỗ cần sử dụng, chúng ta còn có thể dùng phím tắt, dễ dàng và tiện hơn rất nhiều.
Mặc định, thuộc tính Completion Shortcut sẽ trống. Ví dụ thêm shortcut "hi" như sau.

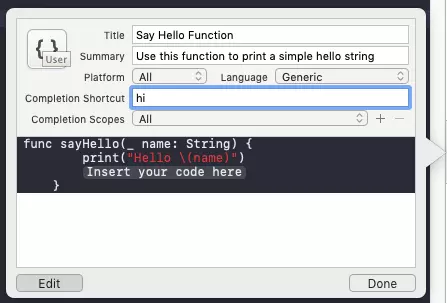
Khi code, ta chỉ cần gõ hi, Xcode sẽ tự suggest các code snippet tương ứng.

Tạo phạm vi sử dụng phím tắt

Đó chính là Completion Scopes, nó chỉ cho phép chúng ta dùng shortcut của code snippet đó ở một phạm vi cụ thể nào đó.
Mặc định, giá trị này là All, nghĩa là ở bất kỳ đâu trong code ta cũng có thể gọi snippet này bằng shortcut.
Có thể chỉnh sửa thêm nhiều Completion Scopes khác nhau.

Nguồn: medium.com

Comments

Popular posts from this blog

Alamofire vs URLSession

Alamofire vs URLSession: a comparison for networking in Swift Alamofire and URLSession both help you to make network requests in Swift. The URLSession API is part of the foundation framework, whereas Alamofire needs to be added as an external dependency. Many  developers  doubt  whether it’s needed to include an extra dependency on something basic like networking in Swift. In the end, it’s perfectly doable to implement a networking layer with the great URLSession API’s which are available nowadays. This blog post is here to compare both frameworks and to find out when to add Alamofire as an external dependency. Build better iOS apps faster Looking for a great mobile CI/CD solution that has tons of iOS-specific tools, smooth code signing, and even real device testing? Learn more about Bitrise’s iOS specific solutions! This shows the real power of Alamofire as the framework makes a lot of things easier. What is Alamofire? Where URLSession...

Swift Tool Belt, Part 1: Adding a Border, Corner Radius, and Shadow to a UIView with Interface Builder

During my iOS work, I’ve assembled a set of code that I bring with me on every iOS project. I’m not talking about large frameworks or CocoaPods here. These are smaller Swift extensions or control overrides that are applicable to many projects. I think of them as my tool belt. In this post, I’ll show you an extension that will add a border, a corner radius, and a shadow to any UIView, UIButton, or UILabel and allow you to preview what it will look like in Interface Builder. Back in 2014, I wrote a blog post on Expanding User-Defined Runtime Attributes in Xcode where I added a border, corner radius, and shadow to a UIView using Interface Builder’s user-defined runtime attributes. This solution had no type checking—you had to type the property you wanted to modify by hand and often had to look up what it was called. You also had to run your project in order to see the effect of the runtime attribute. Starting with Xcode 6 , there is a new mech...

Frame vs Bounds in iOS

This article is a repost of an answer I wrote on Stack Overflow . Short description frame = a view’s location and size using the parent view’s coordinate system ( important for placing the view in the parent) bounds = a view’s location and size using its own coordinate system (important for placing the view’s content or subviews within itself) Details To help me remember frame , I think of a picture frame on a wall . The picture frame is like the border of a view. I can hang the picture anywhere I want on the wall. In the same way, I can put a view anywhere I want inside a parent view (also called a superview). The parent view is like the wall. The origin of the coordinate system in iOS is the top left. We can put our view at the origin of the superview by setting the view frame’s x-y coordinates to (0, 0), which is like hanging our picture in the very top left corner of the wall. To move it right, increase x, to move it down increase y. To help me remember bound...