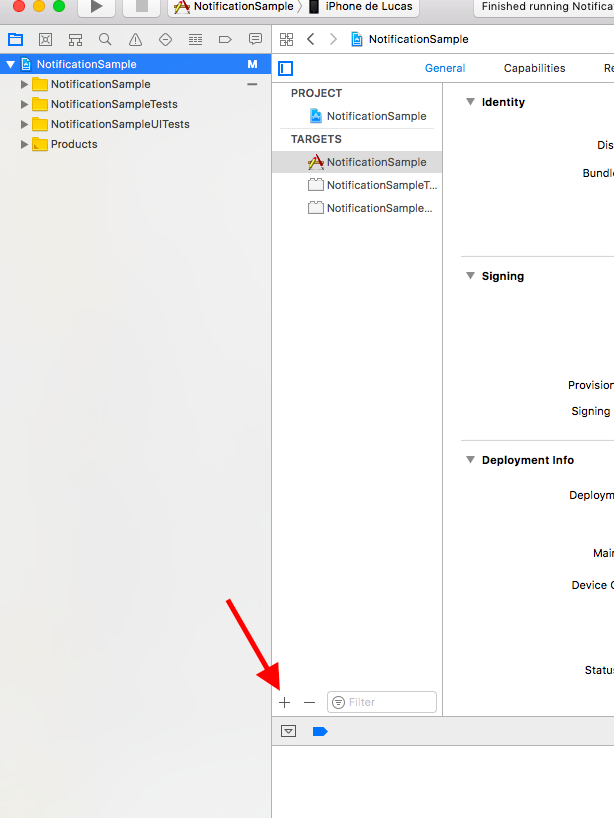
1. Thiết lập Capabilities trong xcodeproj của bạn.
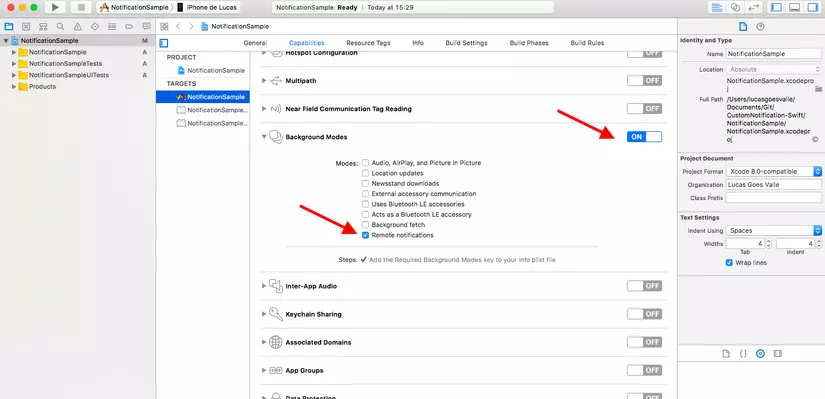
Truy cập xcodeproj của bạn trong xcode, chọn Capabilities và bật Push notifications và Background Modes lên > Tích chọn Remote Notifications. Xcode sẽ tạo cho bạn app id trong Apple Developer.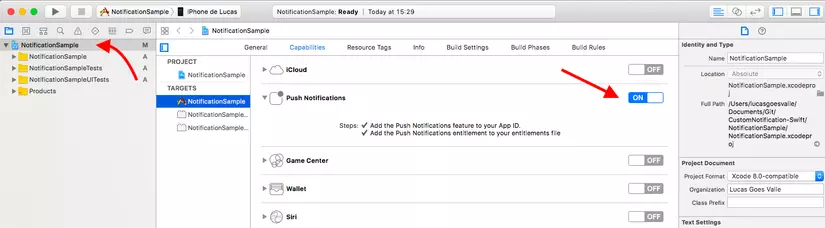
2. Tạo APNs để gửi thông báo.
Truy cập Apple Developer và đăng nhập, sau đó chọn: Certificates, Identifiers & Profiles > Identifiers > App IDs > Chọn app id ứng dụng của bạn và nhấp vào chỉnh sửa để cấu hình Push Notification: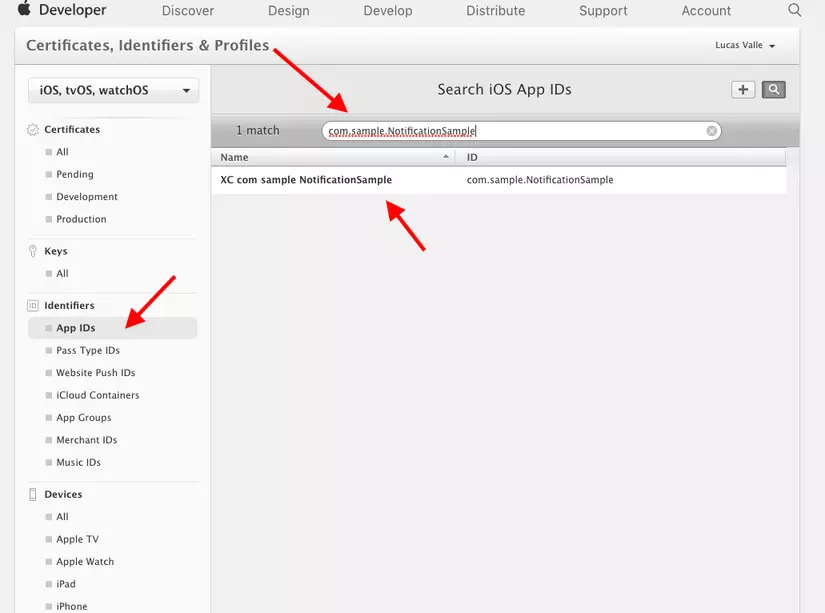
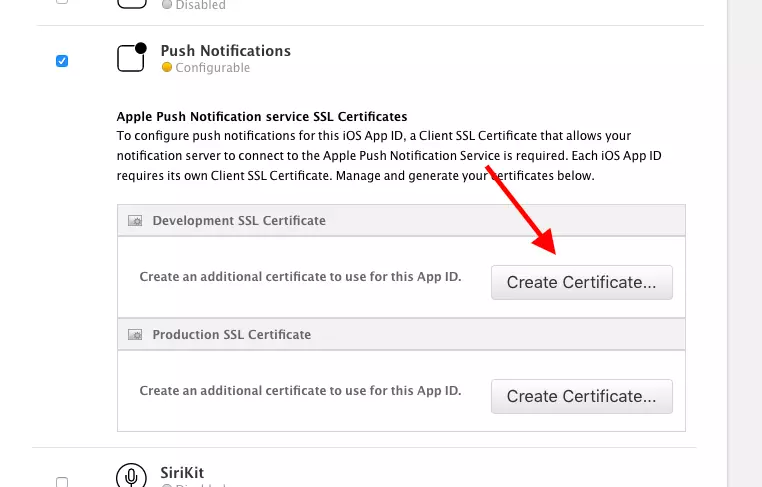
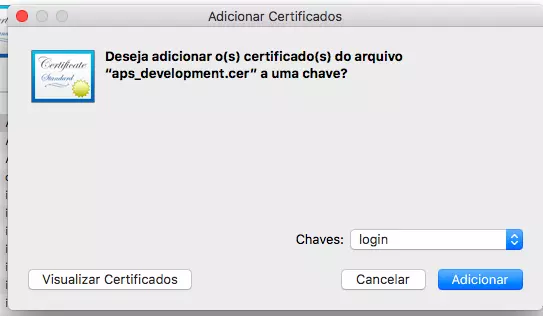
Làm theo các bước và tải certificate vừa được tạo(aps_development.cer), mở certificate và thêm key.
3. Setup để gửi push cho người dùng.
Đầu tiên phải import UserNotification.import UserNotifications
func application(_ application: UIApplication, didRegisterForRemoteNotificationsWithDeviceToken deviceToken: Data) {
  let deviceTokenString = deviceToken.reduce("", {$0 + String(format: "%02X", $1)})
  print("APNs device token: \(deviceTokenString)")
}

func application(_ application: UIApplication, didFailToRegisterForRemoteNotificationsWithError error: Error) {
  print("APNs registration failed: \(error)")
}
func configureNotification() {
  if #available(iOS 10.0, *) {
      let center = UNUserNotificationCenter.current()
      center.requestAuthorization(options:[.badge, .alert, .sound]){ (granted, error) in }
  }
  UIApplication.shared.registerUserNotificationSettings(UIUserNotificationSettings(types: [.badge, .sound, .alert], categories: nil))
  UIApplication.shared.registerForRemoteNotifications()
}
import UIKit
import UserNotifications

@UIApplicationMain
class AppDelegate: UIResponder, UIApplicationDelegate, UNUserNotificationCenterDelegate {

    var window: UIWindow?


    func application(_ application: UIApplication, didFinishLaunchingWithOptions launchOptions: [UIApplicationLaunchOptionsKey: Any]?) -> Bool {
        self.configureNotification()
        return true
    }

    func applicationWillResignActive(_ application: UIApplication) {
    }

    func applicationDidEnterBackground(_ application: UIApplication) {
    }

    func applicationWillEnterForeground(_ application: UIApplication) {
    }

    func applicationDidBecomeActive(_ application: UIApplication) {
    }

    func applicationWillTerminate(_ application: UIApplication) {
    }

    func configureNotification() {
        if #available(iOS 10.0, *) {
            let center = UNUserNotificationCenter.current()
            center.requestAuthorization(options:[.badge, .alert, .sound]){ (granted, error) in }
        }
        UIApplication.shared.registerUserNotificationSettings(UIUserNotificationSettings(types: [.badge, .sound, .alert], categories: nil))
        UIApplication.shared.registerForRemoteNotifications()
    }

    func application(_ application: UIApplication, didRegisterForRemoteNotificationsWithDeviceToken deviceToken: Data) {
        let deviceTokenString = deviceToken.reduce("", {$0 + String(format: "%02X", $1)})
        print("APNs device token: \(deviceTokenString)")
    }

    func application(_ application: UIApplication, didFailToRegisterForRemoteNotificationsWithError error: Error) {
        print("APNs registration failed: \(error)")
    }
}
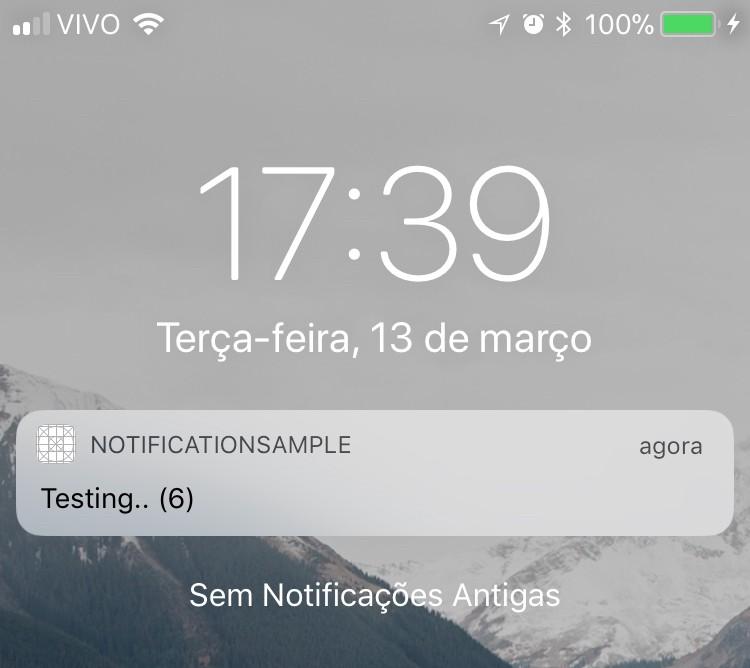
5. Gửi một push bình thường để kiểm tra.
Bây giờ chạy ứng dụng của bạn với đúng certificate, có thể được trong Automatically manage signing. Sau khi chạy, hãy đặt ứng dụng của bạn ở background. Sử dụng NWPusher một công cụ để gửi push.Sau khi cài đặt mở và chọn certificate phù hợp để gửi push cho ứng dụng của bạn, sẽ như sau:

Giờ bạn lấy device token được in ra từ console trong xcode, cần một device thật để nhận được push.
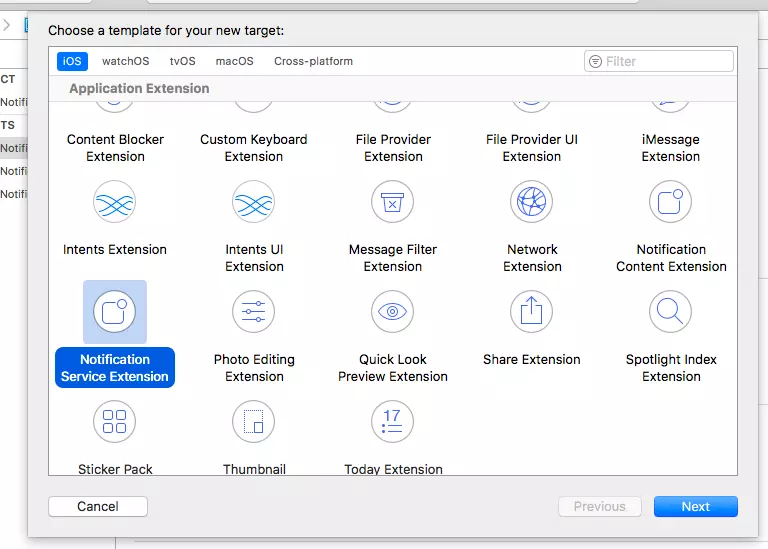
6. Bắt đầu Custom Push Notification
Sử dụng UNNotificationCategory để xác định loại notification của bạn có thể nhận được, vì điều này có thể custom push notifcation cụ thể. Trong phương thức configureNotification, chúng ta sẽ thêm UNNotificationCategory và UNNotificationAction cho push custom của chúng ta. Chỉ cần thêm mã sau vào phương thức của bạn.func configureNotification() {
if #available(iOS 10.0, *) {
let center = UNUserNotificationCenter.current()
center.requestAuthorization(options:[.badge, .alert, .sound]){ (granted, error) in }
center.delegate = notificationDelegate
let openAction = UNNotificationAction(identifier: "OpenNotification", title: NSLocalizedString("Abrir", comment: ""), options: UNNotificationActionOptions.foreground)
let deafultCategory = UNNotificationCategory(identifier: "CustomSamplePush", actions: [openAction], intentIdentifiers: [], options: [])
center.setNotificationCategories(Set([deafultCategory]))
} else {
UIApplication.shared.registerUserNotificationSettings(UIUserNotificationSettings(types: [.badge, .sound, .alert], categories: nil))
}
UIApplication.shared.registerForRemoteNotifications()
}
Quay trở lại NWPusher, nhưng bây giờ push cần phải có thêm tham số mới là: “mutable-content”: ”1”.
Điều quan trọng là phải kiểm tra xem body có đúng hay không, sao chép và dán json này.
{
   "aps":{
      "alert":"dasdas",
      "badge":1,
      "sound":"default",
      "mutable-content":"1"
   }
}
Trong Notification Service Extension của bạn, hãy truy cập NotificationService.swift và tạo extension của UNNotificationAttachment, như sau:
@available(iOSApplicationExtension 10.0, *)
extension UNNotificationAttachment {

    static func saveImageToDisk(fileIdentifier: String, data: NSData, options: [NSObject : AnyObject]?) -> UNNotificationAttachment? {
        let fileManager = FileManager.default
        let folderName = ProcessInfo.processInfo.globallyUniqueString
        let folderURL = NSURL(fileURLWithPath: NSTemporaryDirectory()).appendingPathComponent(folderName, isDirectory: true)

        do {
            try fileManager.createDirectory(at: folderURL!, withIntermediateDirectories: true, attributes: nil)
            let fileURL = folderURL?.appendingPathComponent(fileIdentifier)
            try data.write(to: fileURL!, options: [])
            let attachment = try UNNotificationAttachment(identifier: fileIdentifier, url: fileURL!, options: options)
            return attachment
        } catch let error {
            print("error \(error)")
        }

        return nil
    }
}
var urlString:String? = nil
if let urlImageString = request.content.userInfo["urlImageString"] as? String {
    urlString = urlImageString
}

if urlString != nil, let fileUrl = URL(string: urlString!) {
    print("fileUrl: \(fileUrl)")

    guard let imageData = NSData(contentsOf: fileUrl) else {
        contentHandler(bestAttemptContent)
        return
    }
    guard let attachment = UNNotificationAttachment.saveImageToDisk(fileIdentifier: "image.jpg", data: imageData, options: nil) else {
        print("error in UNNotificationAttachment.saveImageToDisk()")
        contentHandler(bestAttemptContent)
        return
    }

    bestAttemptContent.attachments = [ attachment ]
}
import UserNotifications

class NotificationService: UNNotificationServiceExtension {

    var contentHandler: ((UNNotificationContent) -> Void)?
    var bestAttemptContent: UNMutableNotificationContent?

    override func didReceive(_ request: UNNotificationRequest, withContentHandler contentHandler: @escaping (UNNotificationContent) -> Void) {
        self.contentHandler = contentHandler
        bestAttemptContent = (request.content.mutableCopy() as? UNMutableNotificationContent)

        if let bestAttemptContent = bestAttemptContent {
            // Modify the notification content here...
            bestAttemptContent.title = "\(bestAttemptContent.title) [modified]"

            var urlString:String? = nil
            if let urlImageString = request.content.userInfo["urlImageString"] as? String {
                urlString = urlImageString
            }

            if urlString != nil, let fileUrl = URL(string: urlString!) {
                print("fileUrl: \(fileUrl)")

                guard let imageData = NSData(contentsOf: fileUrl) else {
                    contentHandler(bestAttemptContent)
                    return
                }
                guard let attachment = UNNotificationAttachment.saveImageToDisk(fileIdentifier: "image.jpg", data: imageData, options: nil) else {
                    print("error in UNNotificationAttachment.saveImageToDisk()")
                    contentHandler(bestAttemptContent)
                    return
                }

                bestAttemptContent.attachments = [ attachment ]
            }

            contentHandler(bestAttemptContent)
        }
    }

    override func serviceExtensionTimeWillExpire() {
        // Called just before the extension will be terminated by the system.
        // Use this as an opportunity to deliver your "best attempt" at modified content, otherwise the original push payload will be used.
        if let contentHandler = contentHandler, let bestAttemptContent =  bestAttemptContent {
            contentHandler(bestAttemptContent)
        }
    }

}

@available(iOSApplicationExtension 10.0, *)
extension UNNotificationAttachment {

    static func saveImageToDisk(fileIdentifier: String, data: NSData, options: [NSObject : AnyObject]?) -> UNNotificationAttachment? {
        let fileManager = FileManager.default
        let folderName = ProcessInfo.processInfo.globallyUniqueString
        let folderURL = NSURL(fileURLWithPath: NSTemporaryDirectory()).appendingPathComponent(folderName, isDirectory: true)

        do {
            try fileManager.createDirectory(at: folderURL!, withIntermediateDirectories: true, attributes: nil)
            let fileURL = folderURL?.appendingPathComponent(fileIdentifier)
            try data.write(to: fileURL!, options: [])
            let attachment = try UNNotificationAttachment(identifier: fileIdentifier, url: fileURL!, options: options)
            return attachment
        } catch let error {
            print("error \(error)")
        }

        return nil
    }
}
{
   "aps":{
      "alert":"dasdas",
      "badge":1,
      "sound":"default",
      "mutable-content":"1"
   },
   "urlImageString":"https://res.cloudinary.com/demo/image/upload/sample.jpg"
}

Quan trọng: lưu ý rằng URL hình ảnh là HTTPS nếu bạn cần hiển thị URL hình ảnh HTTP, trong plist.info của Notification Service Extension bạn phải cho phép domain hoặc cho phép mọi domain.
<key>NSAppTransportSecurity</key>
  <dict>
      <key>NSAllowsArbitraryLoads</key>
      <true/>
  </dict>
Comments
Post a Comment