Phần tiếp theo chúng ta sẽ tìm hiểu các operator còn lại
4.Create Operator
- Create : khởi tao 1 obervable, trả về các observer dùng onNext,onComplete,OnError.
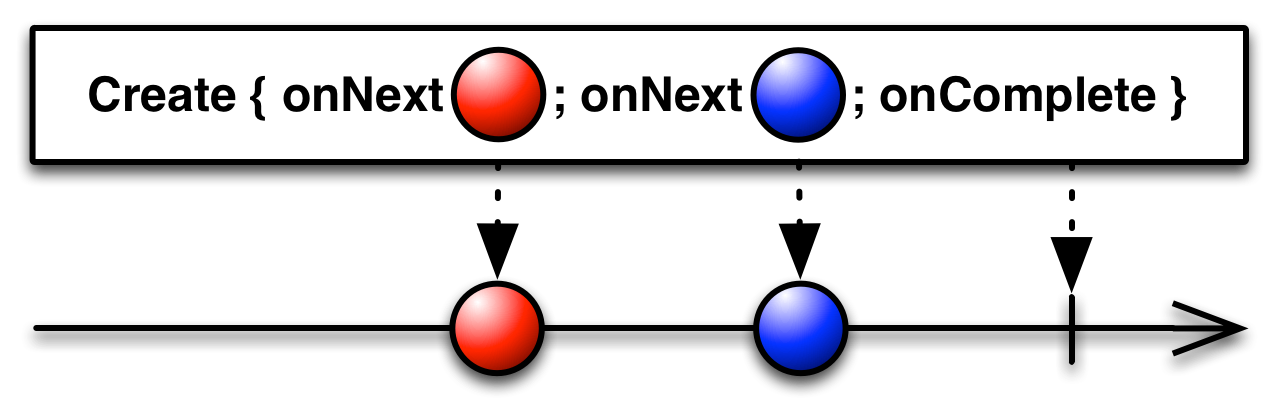
func createGoogleDataObservable() -> Observable<String> {

        return Observable<String>.create({ (observer) -> Disposable in

            let session = URLSession.shared
            let task = session.dataTask(with: URL(string:"https://www.simple.com")!) { (data, response, error) in

                DispatchQueue.main.async {
                    if let err = error {
                            observer.onError(err)
                    } else {
                        if let string = String(data: data!, encoding: .ascii) {
                            observer.onNext(string!)
                        } else {
                            observer.onNext("Error! Parse!")
                        }
                        observer.onCompleted()
                    }
                }
            }

            task.resume()            return Disposables.create(with: {
                task.cancel()
            })
        })
}
- From : chuyển các objects và data type thành array observable
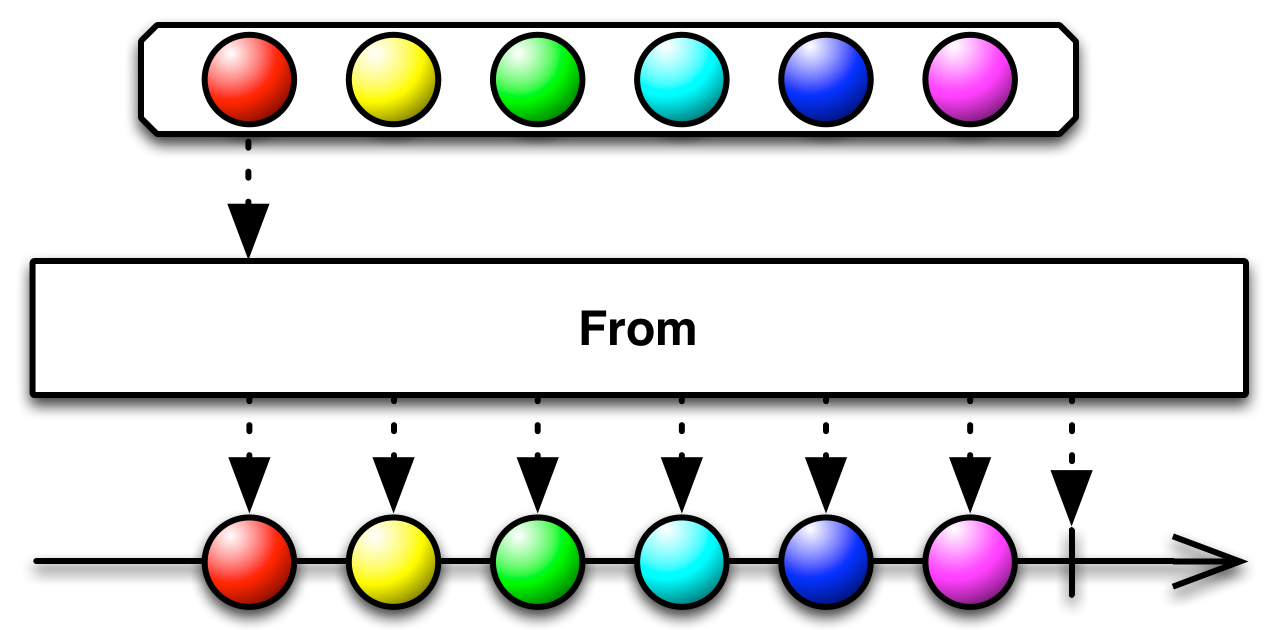
let observalbe : Observable<Int> = Observable.from([1,2,3,4,5])
observalbe.subscribe(onNext: {
        print($0)
})
.disposed(by: disposeBag)
- Just : tạo ra chỉ một observable
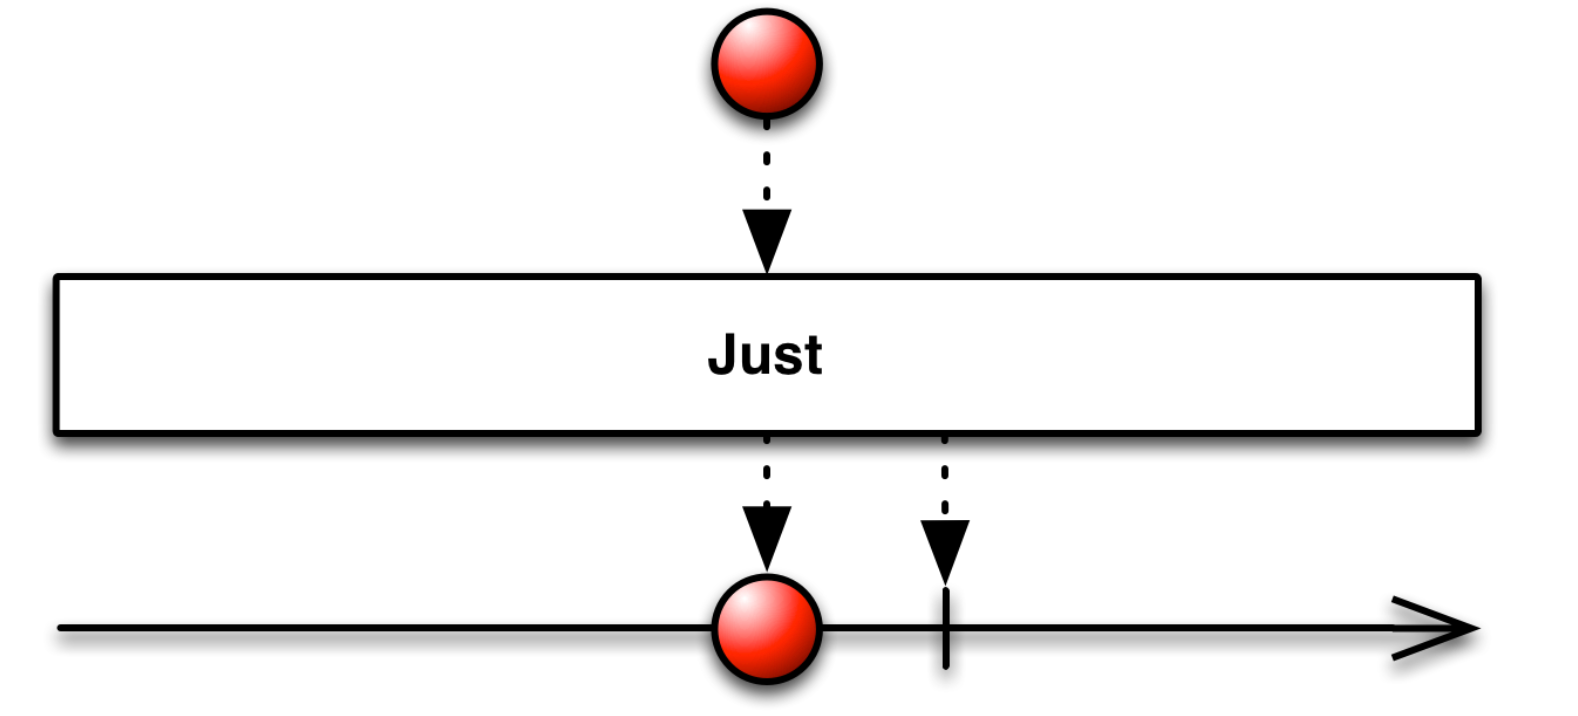
let observable = Observable<String>.just("Init string")
observalbe.subscribe(onNext: {
        print($0)
    })
.disposed(by: disposeBag)
- Of : tạo ra 1 array hoặc 1 observable
// Tạo ra 1 single
let observalbe = Observable.of([1,2,3,4,5]) //[1,2,3,4,5]// Tạo ra 1 array
let observalbe = Observable.of(1,2,3,4,5)//1
//2
//3
//4
//5
5.Error Handling : trong
ứng dụng chúng ta sẽ thường xuyên có nhiều error như : no internet
connection , error input , API error, parse error… Chúng ta cần bắt
error trong observable.
+Catch : dùng để bắt lỗi từ onError và sẽ tiếp tục sequence

Cách gồm : catchError vs catchErrorJustReturn
- catchError : khi onError return về block kèm theo tham số NSError
public func catchError(_ handler: @escaping (Error) throws -> RxSwift.Observable<Self.E>) -> RxSwift.Observable<Self.E>
Ví dụ: Trả về tiếp 1 observable có giá trị mặc định
.catchError { error in
  if let text = text, let cachedData = self.cache[text] {
    return Observable.just(cachedData)
  } else {
    return Observable.just(Model())
  }
}
- catchErrorJustReturn : set giá trị khi error
public func catchErrorJustReturn(_ element: Self.E) -> RxSwift.Observable<Self.E>
Ví dụ : Trả về mảng rỗng
let searchResults = searchText
.throttle(0.3, $.mainScheduler)
.distinctUntilChanged
.flatMapLatest { query in
      API.getSearchResults(query)
      .retry(3)
      .startWith([])
      .catchErrorJustReturn([])
}
+Retry : thử lại khi lỗi, và thường đặt trước khi cach error
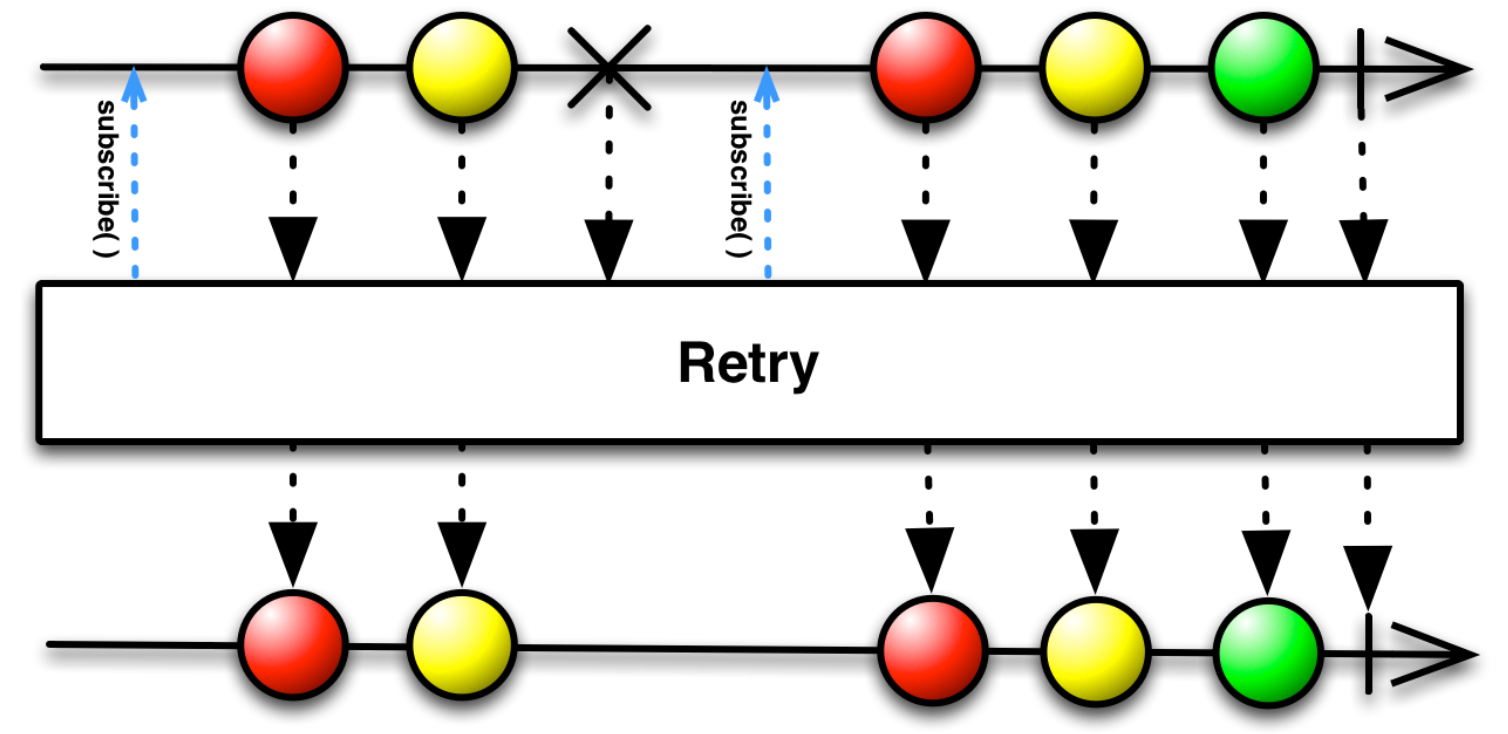
Ví dụ : retry 3 lần
.retry(3)
.catchError { error in
  if let text = text, let cachedData = self.cache[text] {
    return Observable.just(cachedData)
  } else {
    return Observable.just(Model())
  }
}
Dùng retryWhen để check nâng cao
.retryWhen { e in
  return e.flatMapWithIndex { (error, numberTry) -> Observable<Int> in
    if numberTry >= maxRetry - 1 {
      return Observable.error(error)
    }
    return Observable<Int>.timer(Double(numberTry + 1), scheduler: MainScheduler.instance).take(1)
 }
}
- Custom error : dùng enum để define.Dùng throw hoặc Observable.error
enum ApiError: Error {
  case noInternetConnection
  case serverError
}return session.rx.response(request: request).map() { response, data in
  if 200 ..< 300 ~= response.statusCode {
    return JSON(data: data)
  } else if 400 ..< 500 ~= response.statusCode {
    throw ApiError.cityNotFound
    //return Observable.error(ApiError.cityNotFound)} else {
    throw ApiError.serverError
    //return Observable.error(ApiError.serverError)
  }
}//Check error
onError: { [weak self] e in

}
6.Các Utility thường dùng
- observeOn : chuyển thread(queue) khi obserser nhận đc notification
Ví dụ : Update UI ở main thread
observable
    .observeOn(MainScheduler.instance)
    .subscribe(onNext: { (data) in]
        //Update UI on Main Thread
    })
.addDisposableTo(disposeBag)
- subcribeOn : chuyển thread(queue) khi bắt đầu xử lý observable
Ví dụ : xử lý ở background thread trc khi trả về
// Scheduler
let bgScheduler = ConcurrentDispatchQueueScheduler(qos: .background)sequence
  .subcribeOn(bgScheduler)
  .map { n in
      print("This is performed on the background scheduler")
  }
  .observeOn(MainScheduler.instance)
  .map { n in
      print("This is performed on the main scheduler")
  }
7. Schedulers : 1 loại giống như thread/queue , chúng ta muốn thread chạy trong subcribeOn or observeOn thực hiện :
- MainScheduler : main thread.
- CurrentThreadScheduler : thread hiện tại.
- SerialDispatchQueueScheduler : thực hiện dispatch_queue_t serial , loại này thường dùng cho observeOn.
- ConcurrentDispatchQueueScheduler : thực hiện dispatch_queue_t concurrent, loại này thường dùng khi chạy ở background.
- OperationQueueScheduler : thực hiện NSOperationQueue, thường dùng cho background chạy concurrent, và chúng ta set được số lượng concurrent : maxConcurrentOperationCount
Ví dụ :
// Background concurrent Scheduler
let bgScheduler = ConcurrentDispatchQueueScheduler(qos: .background)// Default concurrent Scheduler
var myWorkScheduler: SchedulerType = ConcurrentDispatchQueueScheduler(qos: .default)// Main Scheduler
MainScheduler.instance// BG OperationQueueScheduler
let operationQueue = OperationQueue()
operationQueue.maxConcurrentOperationCount  = 3
operationQueue.qualityOfService = .background
let bgScheduler = OperationQueueScheduler(operationQueue: operationQueue)
Phần sau mình sẽ giới thiệu các bạn về RxCocoa và Binding.
Comments
Post a Comment